1. Creating a new site via the user interface
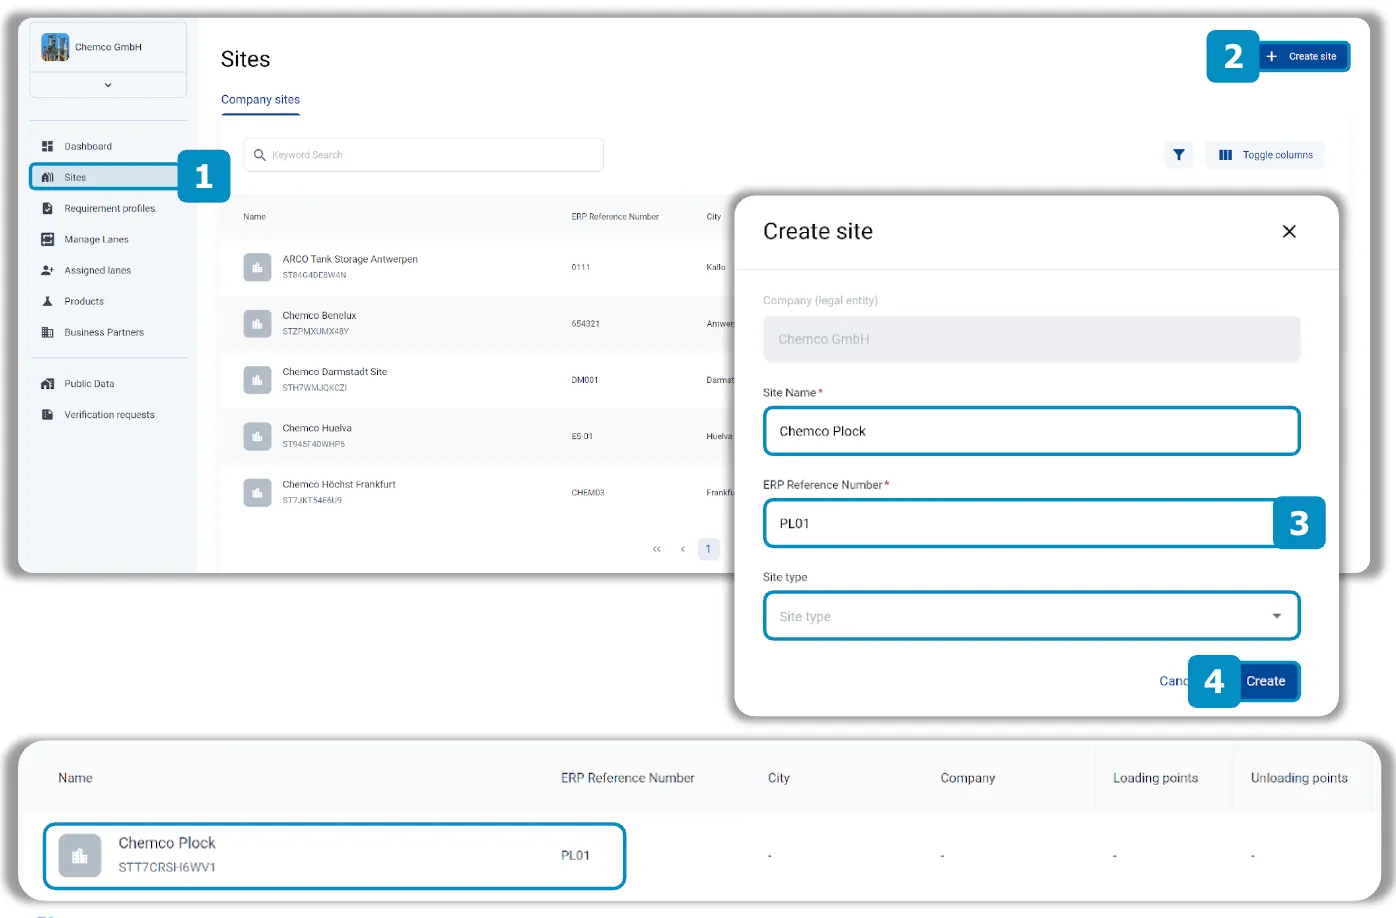
- Click on Sites in the navigation bar
- This opens a list of all existing sites
- Click on Create site
- Enter the Site Name, the ERP reference number and select a Site type
- NOTE 1: If your company uses an ERP system, the same nomenclature should ideally be used on Loady. This is the only way that data can be transferred between Loady and the ERP system via an interface
- NOTE 2: If a site is created for a rented location (e.g. warehouse), a site type with the prefix Tenant should be selected. These sites do not appear in the public data
- Click on Create
- The site then appears as an object in the list of all existing sites
2. Once a location has been created, the associated data can be maintained and adapted in various (sub)modules
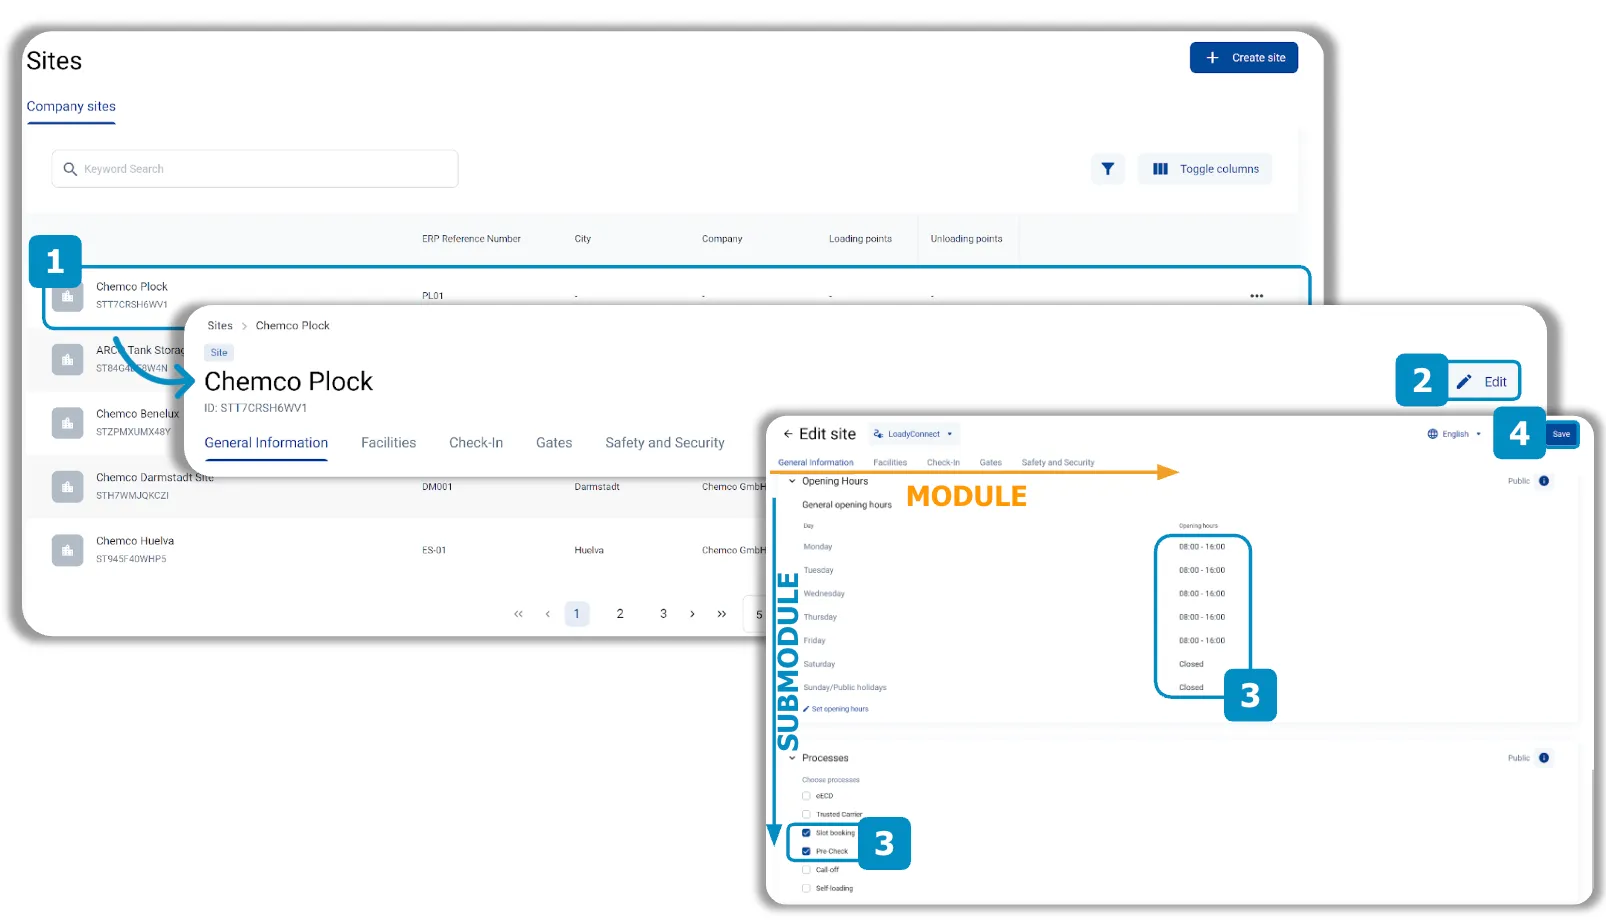
- In the list of Sites, click on the site that you want to maintain. This takes you to the interface of the site and you are in view mode
- Click on Edit to access the edit mode
- Enter all relevant information in the various fields available in the modules and submodules
- Click on Save to save the data in the respective site
E. If individual submodules are not displayed when maintaining objects, they can be configured at module level
INFO: The basic submodule settings are defined by a company admin for the creation of new objects for the entire company. You have the option of showing or hiding submodules if the individual object requires this.
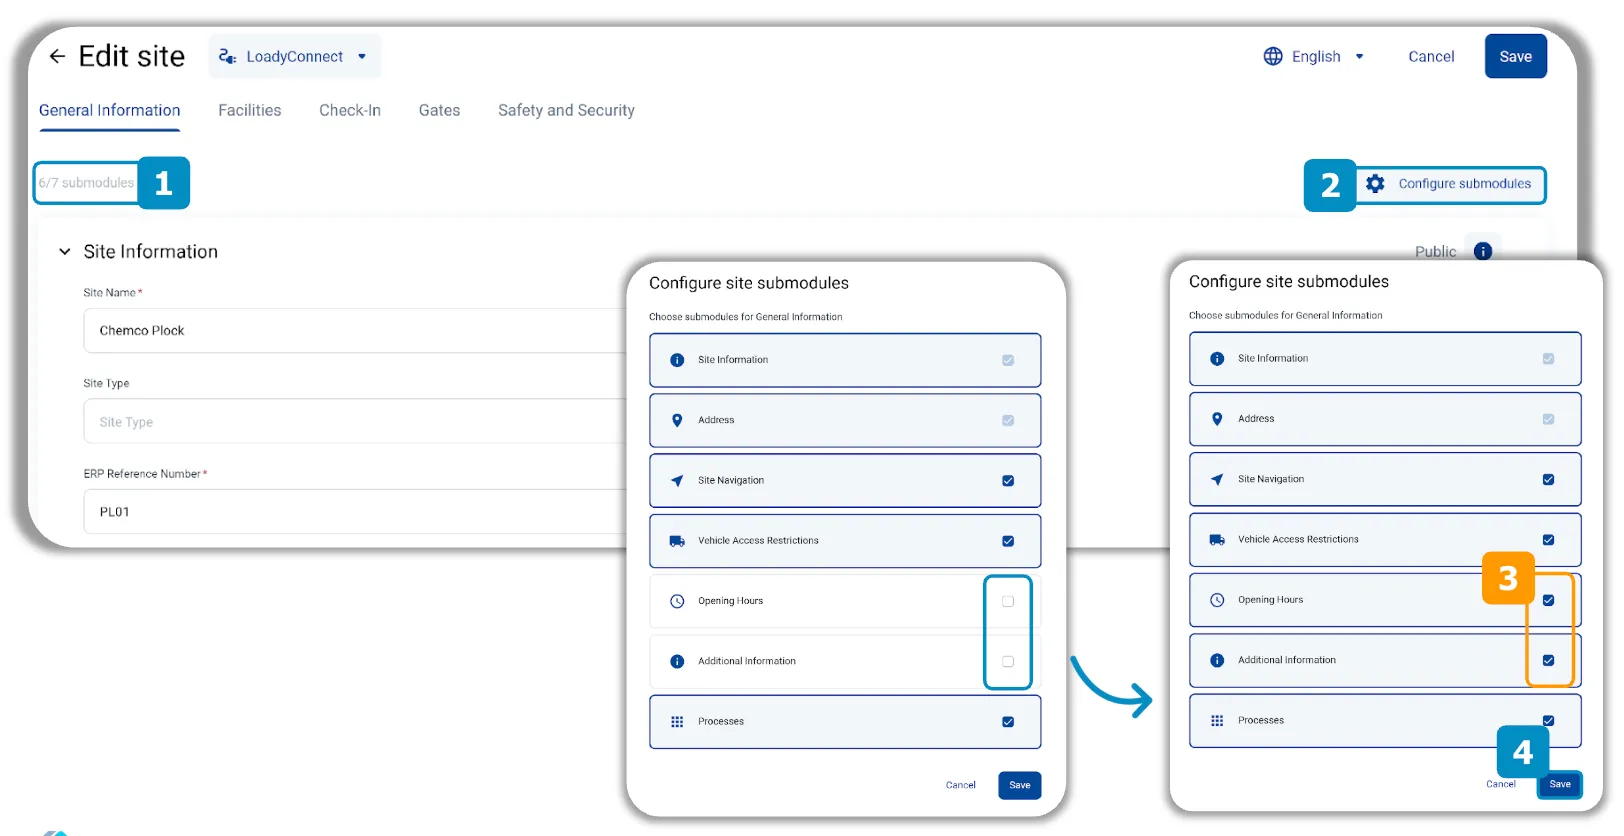
- The upper left corner shows how many of the available submodules are displayed and can be maintained for the respective module
- Click on Configure submodules to see all available submodules and to show or hide submodules
- Select the submodules that should also be shown and deselect those that should be hidden
- Click on Save
3. Manual creation of a new (un)loading point via the user interface
INFO: Several (un)loading points can be added to a location. In your own company context, outbound processes are usually considered. Loading points are therefore created more frequently in this context. In contrast, unloading points are more frequently created in the context of business partners. Data is created and maintained in the same way for unloading and loading points. In this tutorial, the procedure is explained using loading points as an example.
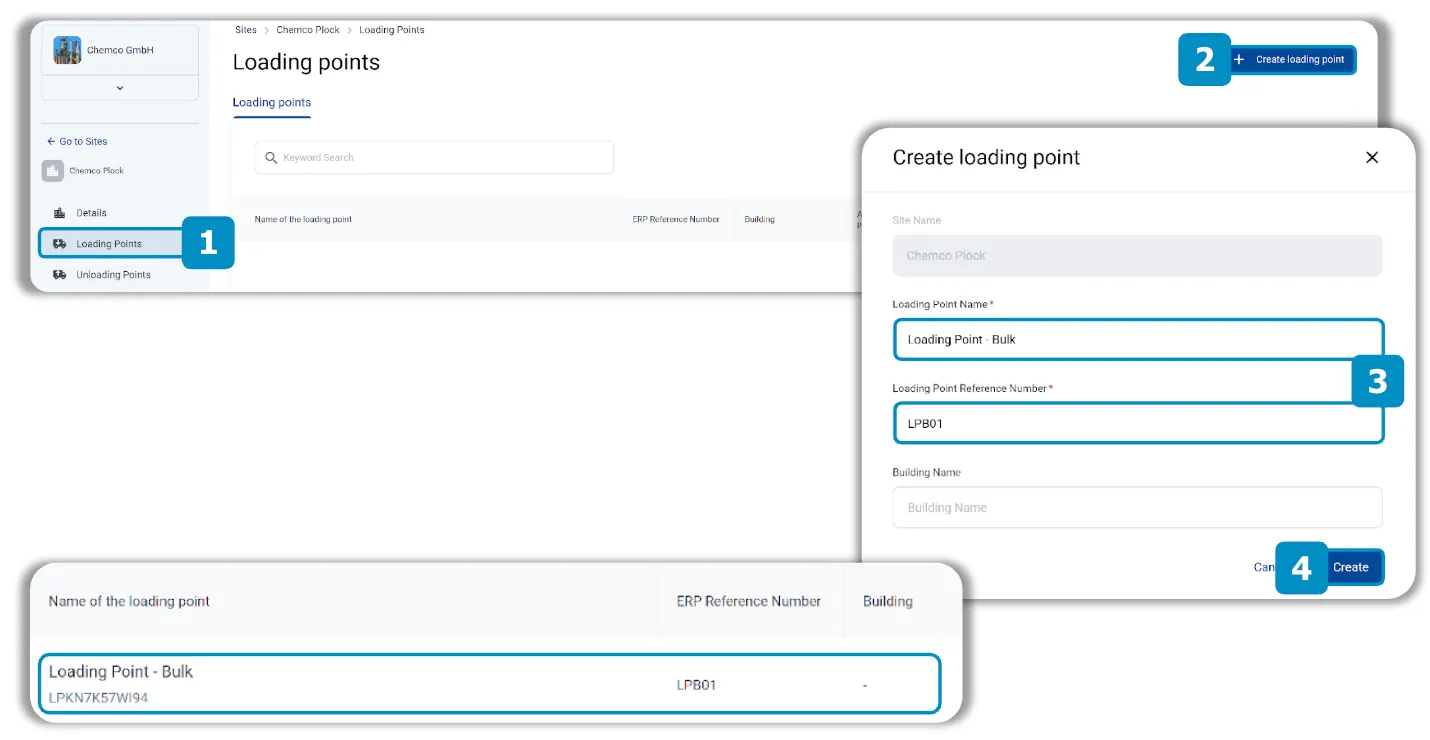
- Click on Loading Points in the navigation bar
- This will open a list of all existing loading points
- Click on Create loading point
- Enter at least the mandatory fields (*) Loading Point Name and
- NOTE: If your company uses an ERP system, the same nomenclature should ideally be used on Loady. This is the only way that data can be transferred between Loady and the ERP system via an interface
- OPTIONAL: Enter a Building Name
- Click on Create
- The loading point then appears as an object in the list of all existing loading points
E. Mass upload of (un)loading points is possible via CSV upload
Recommendation: If there are more than 10 (un)loading points that are to be assigned to different sites, an mass upload of the (un)loading points via CSV upload is preferable to manual installation.

Requirements for CSV-Upload
- Sites to which (un)loading points are to be assigned must already exist on Loady
- The name and ERP reference number for the individual (un)loading points must be defined
- Optional: add the address data and opening hours of the (un)loading points
INFO: For the latest version of the CSV template and support with preparation, please contact support@loady.com
4. Once a (un)loading point has been created, the associated data can be maintained and adapted in various (sub)modules
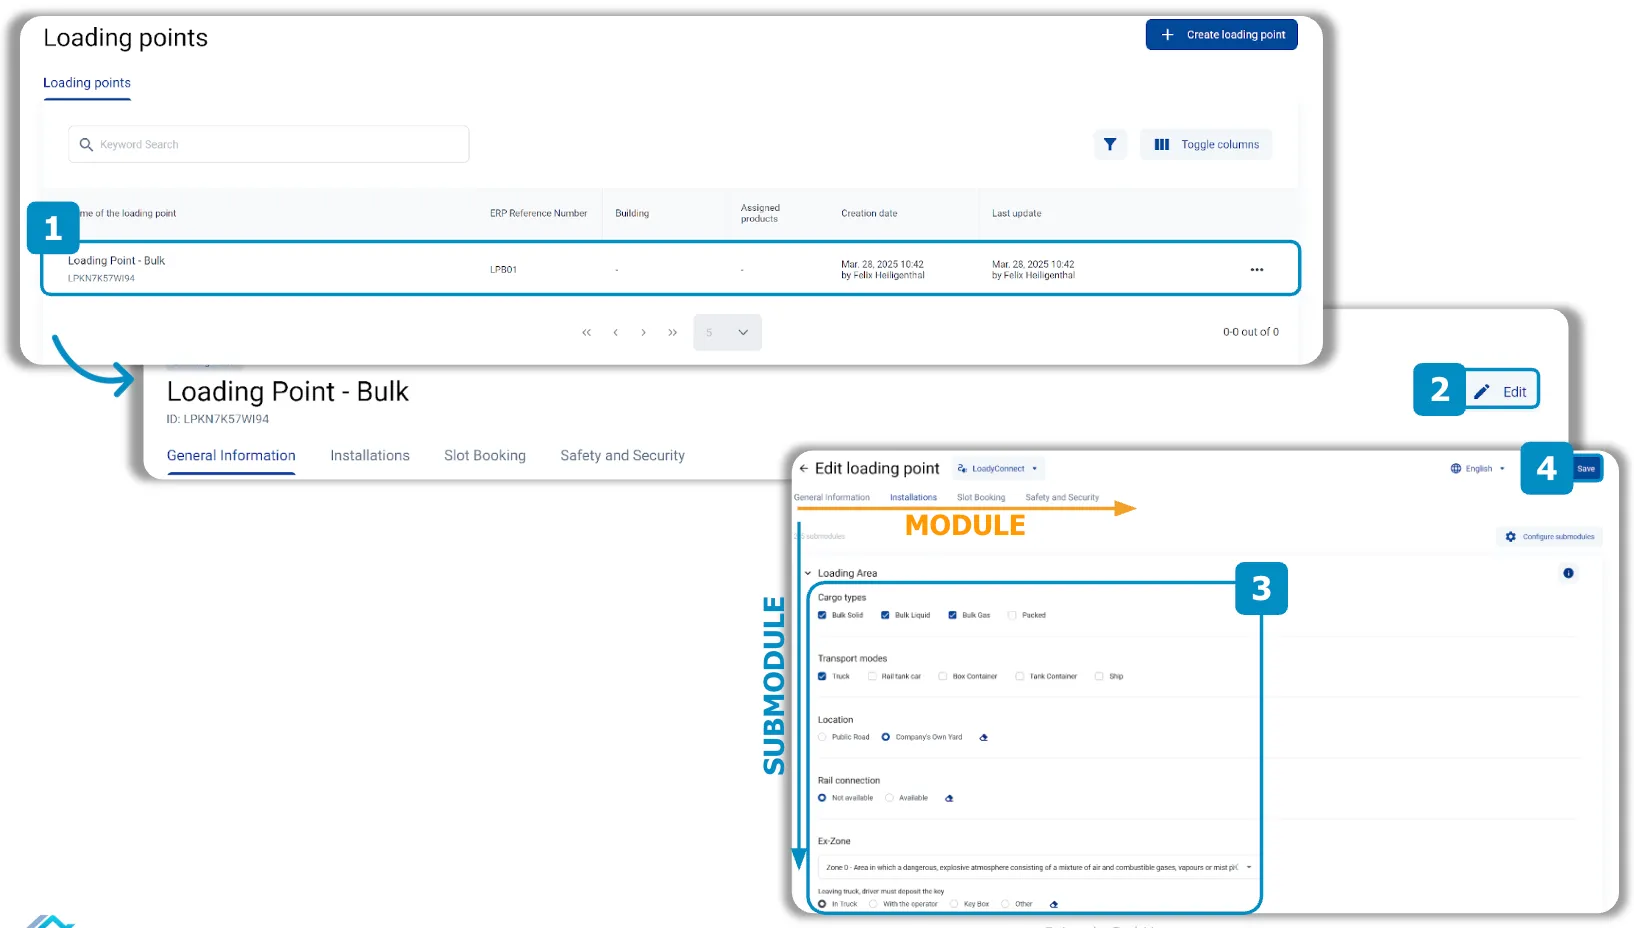
- In the list of Loading Points, click on the site that you want to maintain. This takes you to the interface of the site and you are in view mode
- Click on Edit to access the edit mode
- Enter all relevant information in the various fields available in the modules and submodules
- Click on Save to save the data in the respective (un)loading points
E. If individual submodules are to be hidden during maintenance, they can be configured at module level
INFO: The basic submodule settings are defined by a company admin for the creation of new objects for the entire company. You have the option of showing or hiding submodules if the individual object requires this.
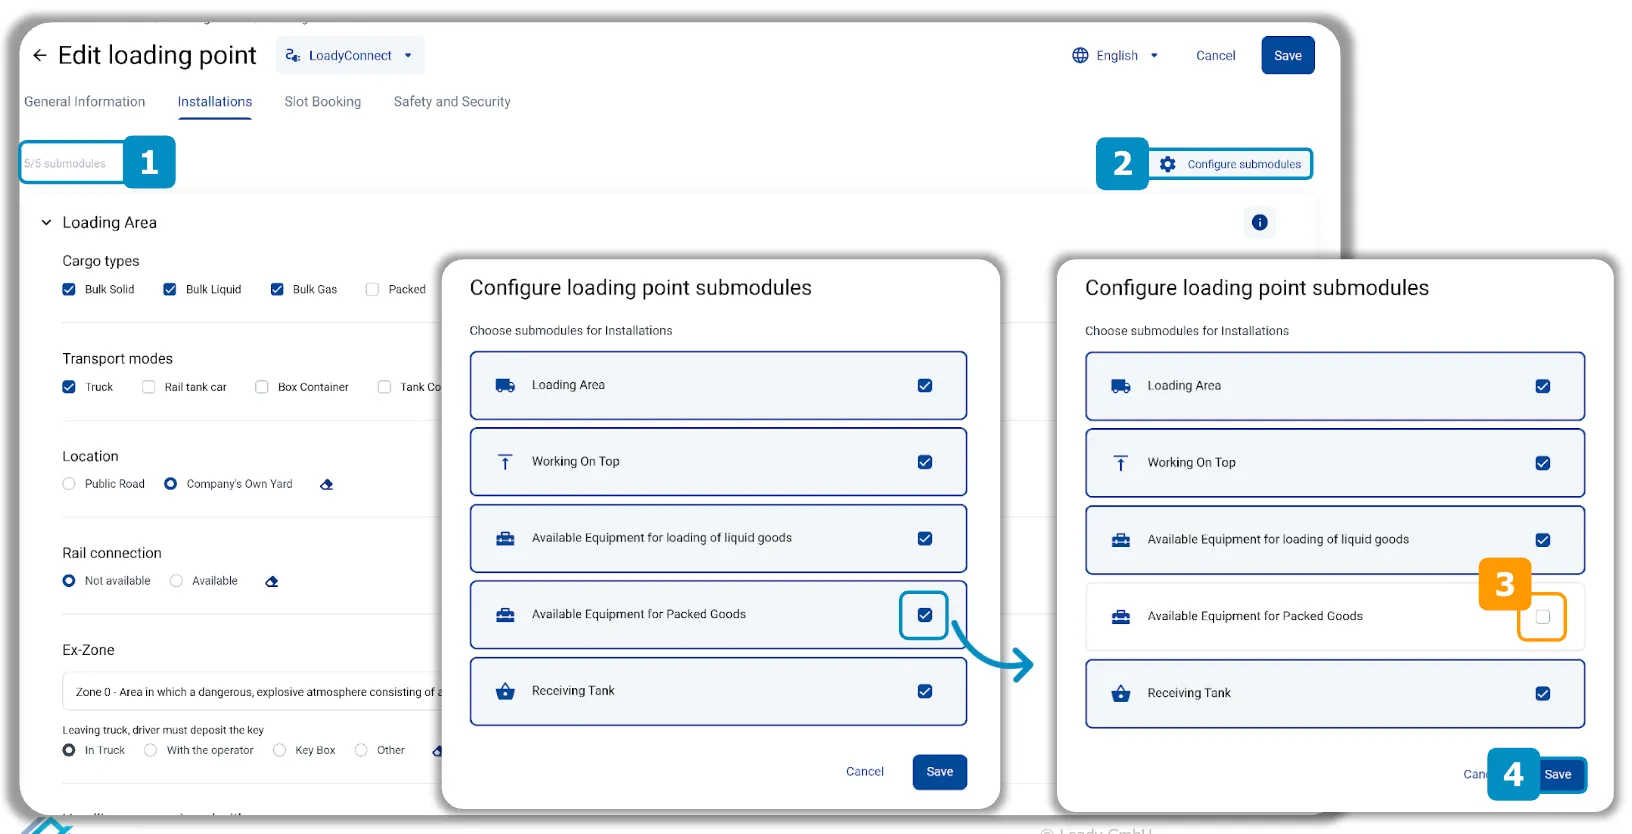
- The upper left corner shows how many of the available submodules are displayed and can be maintained for the respective module
- Click on Configure submodules to see all available submodules and to show or hide submodules
- Deselect the submodules that should be hidden and select those that should be shown
- Click on Save
E. Separate locations and unloading points must be created for business partners
INFO: Separate locations and unloading points must be defined for the business partners (customers, external warehouses, suppliers, etc.) in order to merge the two data sets (own company/business partner) into one lane. In the context of business partners, the inbound processes are generally considered. This is why unloading points are created more often in this context.
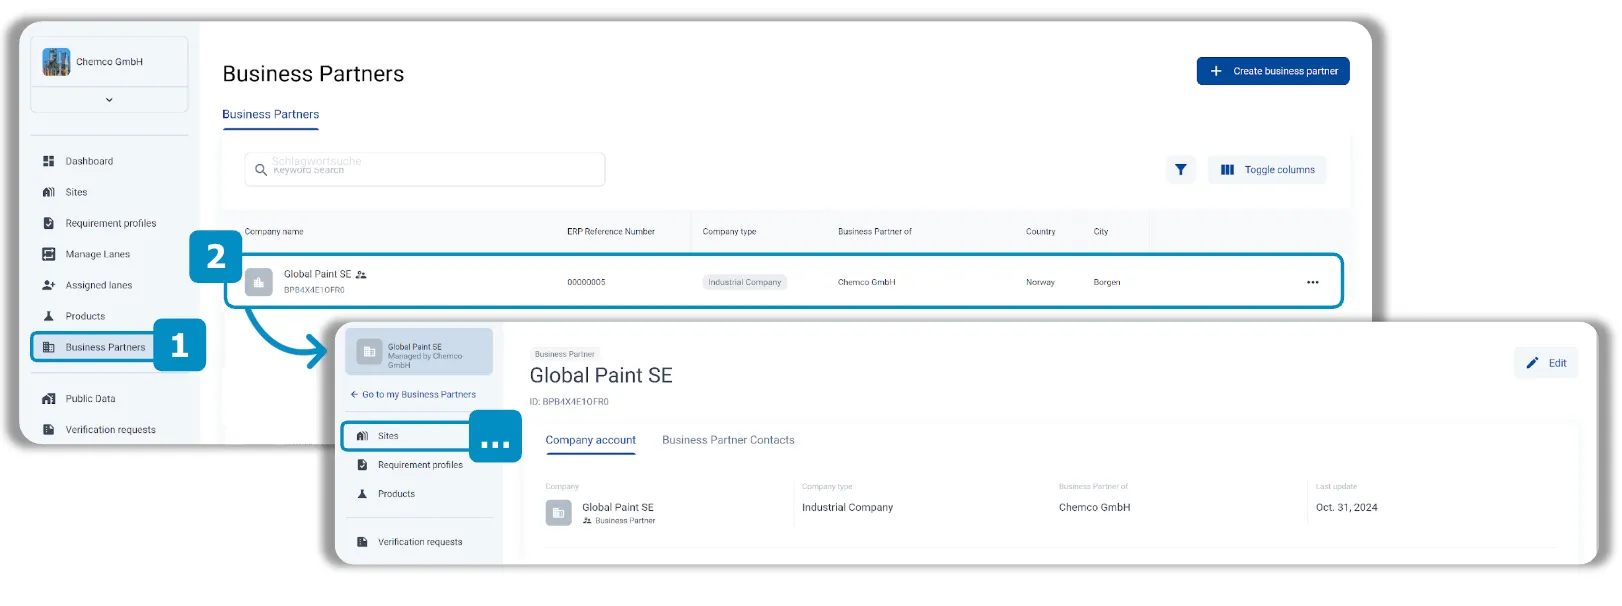
- Click on Business Partners in the navigation bar
- This opens a list of all business partners
- In the list of Business Partners, click on the Business Partner you want to maintain. This will take you to the interface of the respective business partner
- In the context of the selected business partner, follow exactly the same steps as in your own company context to first create Sites and then unloading points:
- Sites: 1 & 2
- (Un)loading points: 3 & 4